Confluent Cloud
Synopsis
This quickstart guide shows how to set up the OData V2 Connectors on Confluent Cloud.
Preliminary Setup
- Make sure to have a working Confluent Cloud environment as described in Confluent Cloud Quickstart Guide.
- Ensure that you have a running cluster with AWS or Microsoft Azure as the provider.
- Confirm that Confluent Cloud has a network connection to the publicly available (read only) Northwind V2 and (read/write) OData V2 services.
In order to be able to upload a custom connector to Cloud, a supported AWS or Microsoft Azure provider and region is currently required. For more information and limitations on custom connectors, see Custom Connectors for Confluent Cloud. Check the list of the cloud providers as well as the regions and zones supported by Confluent Cloud.
Connector Installation
- Go to the menu item Connectors via the left navigation bar and click on the button “Add plugin”.

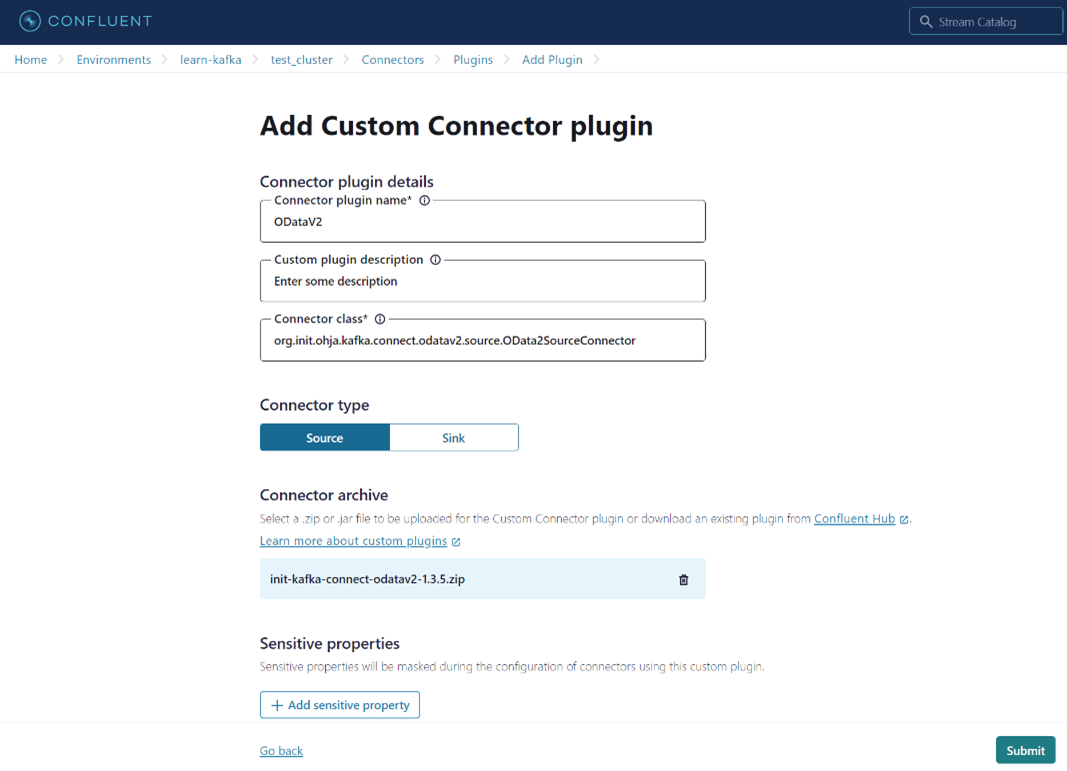
Add Plugin. - Give the connector a name and a description. Specify the path to the connector class and select the type of connector.

Add Custom Connector plugin. - Upload the zipped connector package
init-kafka-connect-odatav2-x.x.x.zipvia the Connector archive. - Click “Submit”. Now the connector should be displayed as a plugin via the Connector menu list.
Connector Configuration
The OData V2 Connectors can be configured via the Connector menu list.
- Select the connector and generate the API key.

Generate API key. - A key and a secret will be generated, write it down and copy it, as it will not be displayed later. Then select “Continue”.
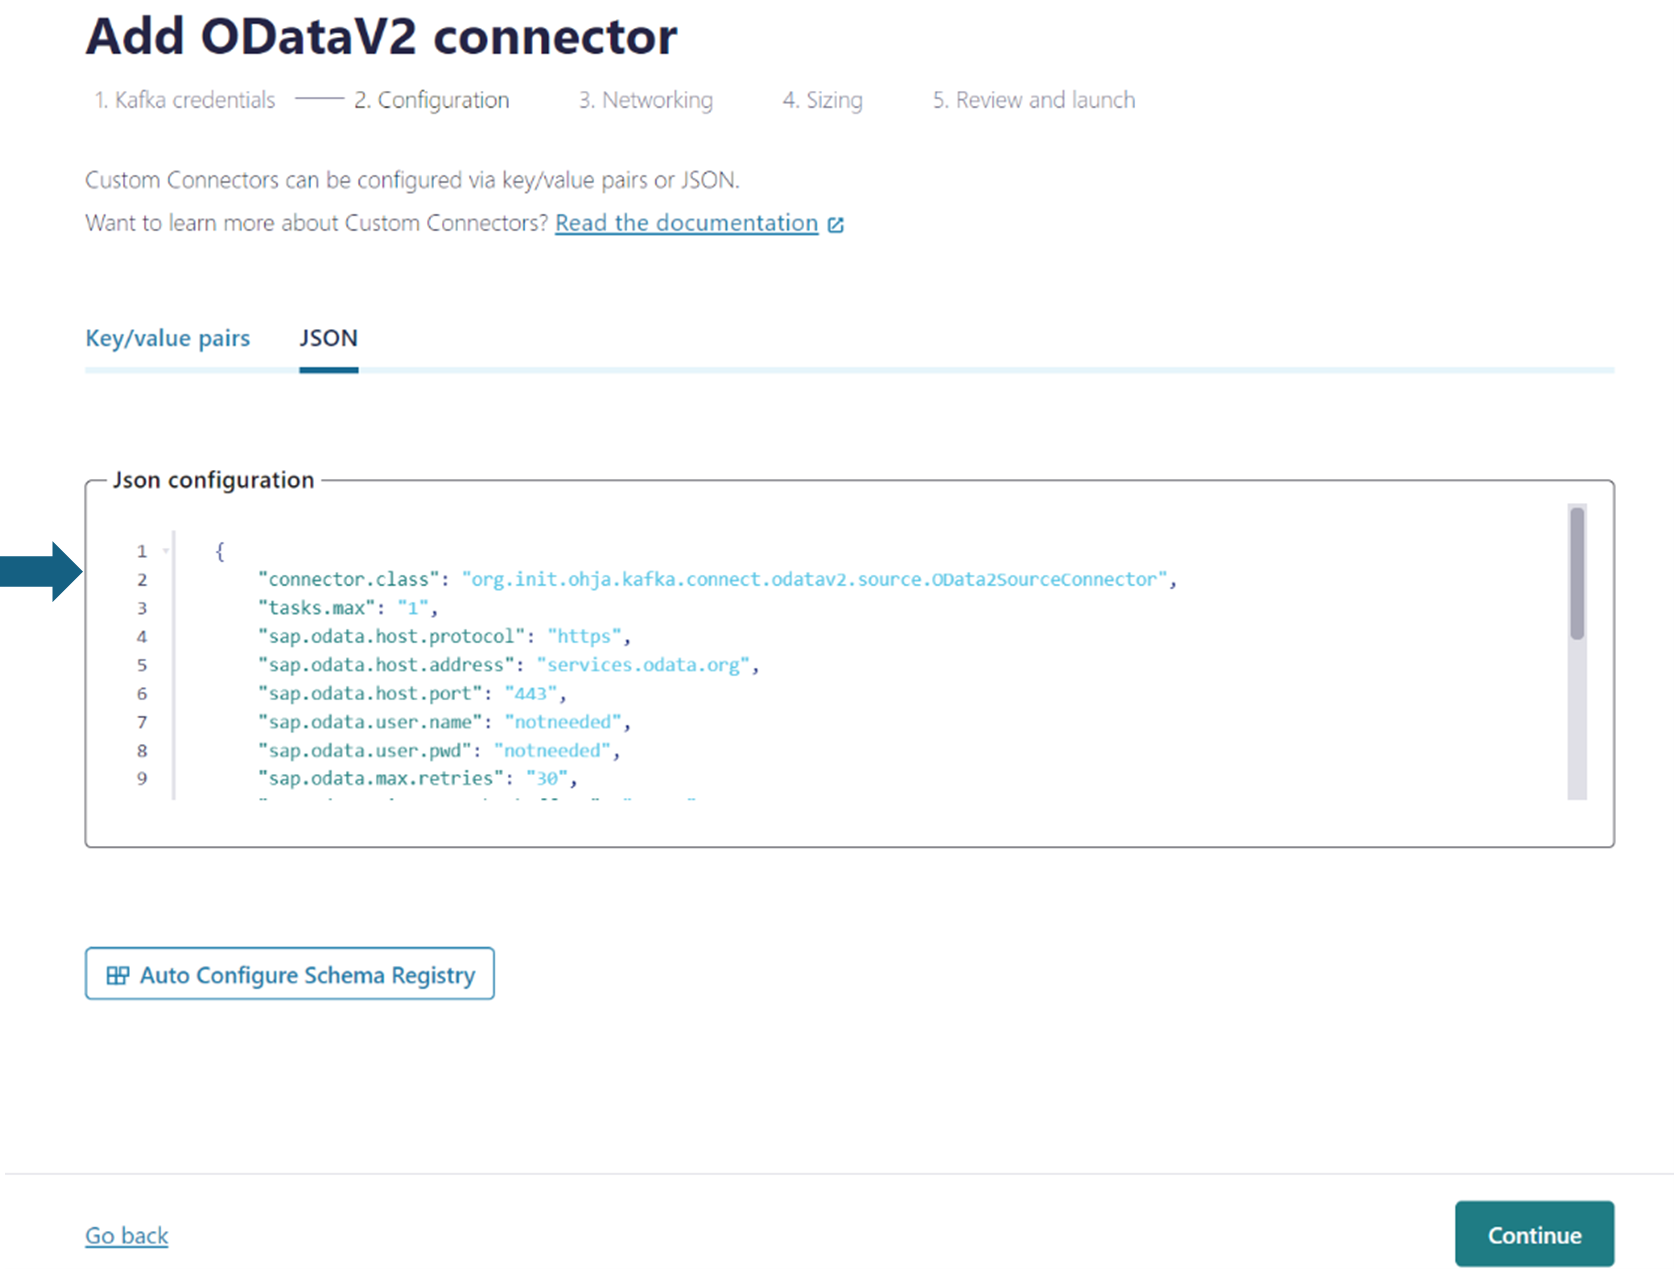
- In this overview, the properties can be inserted via the JSON submenu. Nested layers are not recognized, only the pure config is inserted.

Insert the properties.
OData V2 Source Connector
Extract data from the Northwind V2 service using the OData V2 Source Connector:
-
Transfer the properties including a minimal configuration to the JSON submenu. Remember to include your license key.
name = odata-source-connector connector.class = org.init.ohja.kafka.connect.odatav2.source.OData2SourceConnector tasks.max = 1 sap.odata.license.key = "Your license key here" sap.odata.host.address = services.odata.org sap.odata.host.port = 443 sap.odata.host.protocol = https sap.odata#00.service = /V2/Northwind/Northwind.svc sap.odata#00.entityset = Order_Details sap.odata#00.topic = Order_Details - Click “Continue” to select how many tasks should be used and launch the connector.
- Click “Continue” to get to the ODataV2 Connector overview. The entries can be checked here.
- Click “Continue” to launch the connector. It may take a few minutes for the connector to start. After the connector is launched, the new topics and a new topic for the logs appear under the Topics submenu.
OData V2 Sink Connector
Export data from the OData V2 Sink Connector to the OData V2 service:
- Open OData V2 service in a browser to obtain a temporary service instance URL that allows write operations. The URL will include a
temporary service IDthat replaces the S(readwrite) part of the URL. -
Transfer the properties with a minimal configuration to the JSON submenu. Remember to include the service ID in the service path as well as including your license key.
name = odata-sink-connector connector.class = org.init.ohja.kafka.connect.odatav2.sink.OData2SinkConnector topics = Suppliers tasks.max = 1 sap.odata.license.key = "Your license key here" sap.odata.host.address = services.odata.org sap.odata.host.port = 443 sap.odata.host.protocol = https sap.odata#00.service = /{ENTER SERVICE ID HERE}/V2/OData/OData.svc/ sap.odata#00.entityset = Suppliers sap.odata#00.topic = Suppliers - Launch the sink connector.
- To test the sink connector, you need sample data. You can obtain sample data for all entities from the target OData V2 service instance. You can then import this data into Kafka using the OData V2 Source Connector.